How to Build a Wooden Garden Pergola: Materials, Kits, and Construction Steps
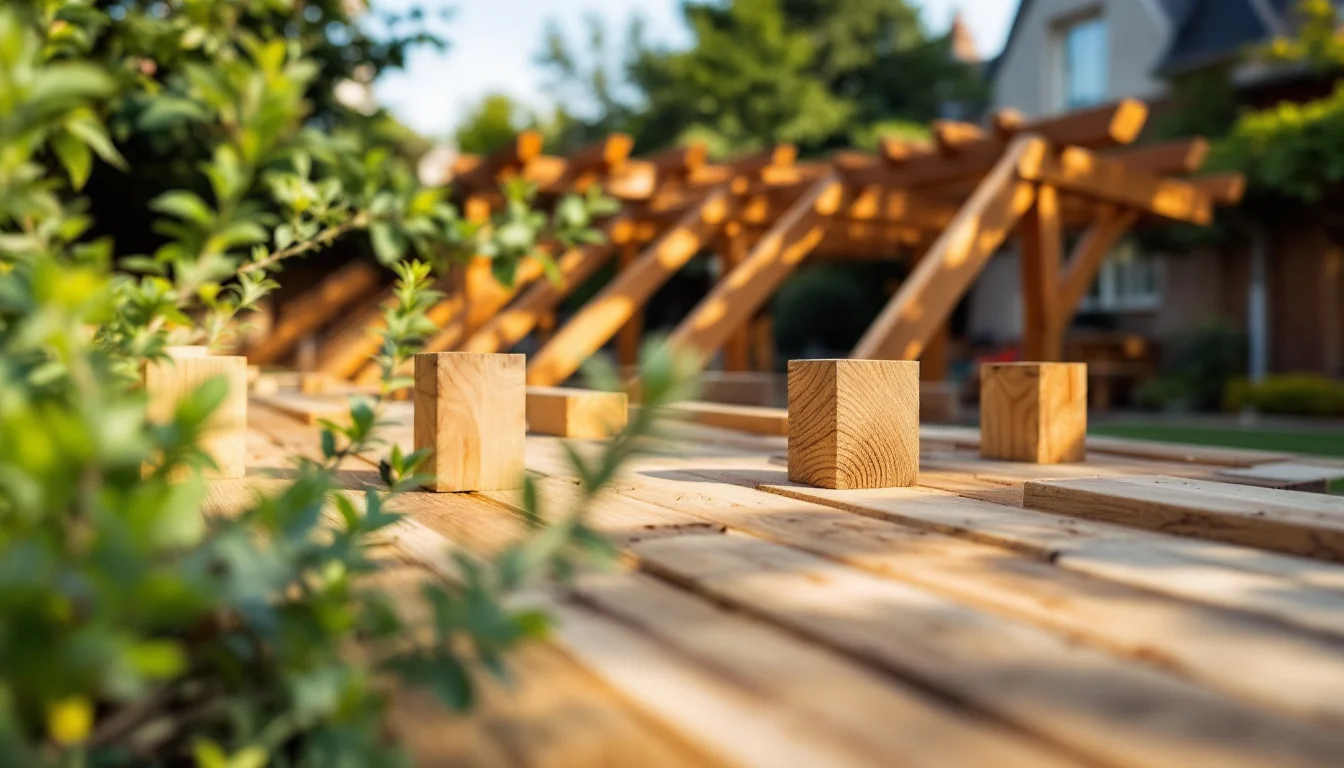
A garden pergola is not just a weekend outdoor aesthetic project; it is a permanent structural addition that demands rigorous engineering. The difference between a timber frame that rots and leans after two years and one that stands true for decades lies entirely below the ground and in the selected hardware. To build a highly durable wooden pergola, the construction phase must prioritise deep frost-line foundations and a rigorous multi-layer wood preservation strategy. Furthermore, understanding the steep operational and usability differences between assembling raw lumber builds and utilising precision-machined DIY kits is crucial for accurate budget and timeline planning. This technical guide outlines the exact construction mechanics and material decisions required to elevate an outdoor space with lasting structural integrity.
Key Takeaways
- Foundation requirements: Permanent stability dictates setting concrete footings deep enough to combat seasonal ground movement and frost heave.
- Material selection: Evaluating DIY kits hinges on factory precision; pre-cut and pre-drilled components are essential, whereas metal systems requiring field welding should be rejected immediately.
- Wood preservation: True structural longevity requires a strict defence system, starting with thorough mechanical surface preparation and ending with multi-coat chemical sealants.
- Roofing systems: Modern structural upgrades range from tensioned fabric to electrically controlled bioclimatic louvers.
Do You Need Planning Permission for a Pergola?
Before excavating a foundation, verifying municipal zoning laws is a strict requirement for any permanent structure.
The parameters for Permitted Development Rights in England and Wales provide one illustrative example of how European municipalities regulate garden structures. According to a vendor-supplied guide, small freestanding pergolas in the UK typically bypass formal planning permission if they meet specific dimensional constraints:
- The structure does not exceed 2.5 m in height when placed within 2 m of a property boundary.
- The maximum height extends to 3 m (or 4 m for a dual-pitched roof) when positioned further inland away from property lines.
- The combined structural footprint of extensions and outbuildings covers no more than 50% of the total land around the original house.
- The pergola is not positioned in front of the principal elevation facing a public highway.
How Deep Do Pergola Footings Need to Be?
Building a resilient timber frame starts directly with the soil conditions. The best base for a pergola is stable, level ground. To prevent the structure from shifting during annual freeze-thaw cycles, concrete foundations must be set deep below the local frost line, which often ranges from 60 to 80 cm in temperate regions but varies significantly by climate. In particularly challenging soil conditions, reinforced concrete slabs or specialised deep ground anchors provide the necessary structural rigidity to prevent settling over time.
Anchoring and Alignment
Once the concrete footings cure, the frame's load-bearing integrity relies on precise hardware execution. Vertical beams placed on concrete foundations are usually secured with heavy-duty ground anchors or stainless steel brackets to keep the porous timber elevated away from standing water and ground moisture.
For the assembly phase, establishing true vertical and horizontal planes is non-negotiable. The assembly is carried out utilising a laser level to ensure perfect structural alignment across the span of the heavy beams. Concurrently, a carpenter's clamp acts as an essential tool, maintaining equal distances between structural joints while the heavy fasteners are driven. Skipping these alignment steps compromises the entire load path, placing undue shear stress on the connecting hardware and drastically increasing the risk of premature structural failure.
Raw Lumber vs. Pre-Drilled Kits: The Structural Choice
Deciding between sourcing raw coniferous wood species — most often pine, spruce, or larch — and purchasing a factory-engineered package drastically impacts project timelines and required skill levels. According to a US kit guide from The Luxury Pergola, evaluating the available material frameworks reveals distinct trade-offs between aesthetic appeal, initial ease of assembly, and long-term maintenance demands.
| Structural Option | Assembly Difficulty | Aesthetic & Customisation | Ongoing Maintenance |
|---|---|---|---|
| Raw Scratch Wood | Very High (requires advanced cutting, routing, and drilling) | Fully customisable traditional timber aesthetic | High (demands frequent sealing and UV protection) |
| Wood DIY Kit | Moderate (components arrive factory-machined) | Traditional aesthetic, fixed manufactured dimensions | High (requires regular wood preservation schedules) |
| Aluminium Kit | Low (engineered bolt-together systems) | Modern profile, limited structural customisation | Very Low (powder-coated, highly rust-resistant) |
| Vinyl Kit | Very Low | Basic, sacrifices structural durability and customisation | Low (lower-quality un-stabilised plastics are prone to UV degradation over long periods) |
Evaluating DIY Kit Quality
When opting for a packaged system, manufacturing tolerances define the entire build experience. For DIY pergola kits, pre-cut and pre-drilled components are essential. Furthermore, if a metal kit requires field welding to join main components, the guide advises walking away entirely.
A complete DIY pergola kit should include all required hardware — specifically bolts, nuts, washers, brackets, anchors, and specialty fasteners — clearly labelled and organised by exact assembly step. A premium package must also provide comprehensive support resources, including printed manuals with precise diagrams, video walkthroughs, and accessible phone support for troubleshooting.
Roofing Mechanics: Balancing Light and Weather Protection
Transforming a slatted frame into a fully sheltered outdoor living space requires integrating mechanical roofing solutions that actively manage precipitation and solar heat gain.
Static and Retractable Systems
For permanent static coverage, multi-wall polycarbonate roofing works highly effectively because it blocks rain while simultaneously transmitting daylight, ensuring the space below is not darkened. To maintain structural integrity during heavy rainfall, preventing water ingress is critical. A three-part assembly — aluminium profiles, EPDM seals, and structural screws with sealing washers — actively closes the panel joints and roof penetrations.
For dynamic shade control, a mechanical fabric canopy operates on a distinct track mechanism. UV-resistant waterproof fabric runs on dedicated guide systems equipped with spring tensioners, allowing the heavy canopy to be seamlessly rolled or unrolled as environmental conditions dictate.
Bioclimatic Engineering
Electrically controlled aluminium louvers work by mechanically tilting on a fixed structural axis to precise degrees, regulating both light and shade under the pergola. This bioclimatic approach channels rainwater into integrated gutter systems when tightly closed, while allowing trapped hot air to vent vertically when angled, maximising the thermal usability of the structure.
Wood Preservation: The Multi-Layer Defence System
Because a wooden pergola requires regular impregnation, protective agents, and rigorous protection against moisture and UV radiation, raw timber demands extensive preparation before assembly begins.
Surface Preparation
Chemical treatments cannot bond to rough, milled, or oxidised surfaces effectively. Basic tools for building a garden pergola include an angle grinder and an orbital sander for heavily smoothing wooden surfaces, along with standard sandpaper in various grits for both initial timber preparation and fine finishing between chemical coats.
Chemical Application
Once the structural timber is sanded completely bare and smooth, the wood finishing system should follow the manufacturer's specific guidelines. The builder typically applies a primer impregnation, followed by appropriate finishing layers such as varnish, oil, or stain. This process creates a deeply penetrating defence against internal rot, sealed by an outer barrier against aggressive UV degradation. To guarantee long-term structural integrity, these maintenance treatments must be repeated at regular intervals—ranging from annually to every 5–7 years—depending on the specific product used, exposure levels, and wood species. However, this recurring chemical treatment burden represents a significant long-term maintenance commitment compared to alternative routes like using naturally durable species or thermally modified timber.
Budget Distribution: Materials, Tools, and Labour Costs
Understanding the financial anatomy of a build highlights the significant savings generated by taking the DIY route. The following baseline costs, estimated in British Pounds (GBP) from a vendor-supplied indicative guide (undated), serve to illustrate general material-to-labour ratios for the UK market. These figures are not Belgian prices and should not be used as such; Belgian costs will differ depending on region, supplier, and applicable VAT rates.
The estimated total cost of a basic medium-size wooden pergola of about 4×3 m in the UK sits around £1,620 to £2,750, while aluminium or bioclimatic models are estimated at £2,660 to £3,800 or more.
Breaking down the raw wood build reveals exactly where the budget goes:
- Material costs: Timber, fixings, and polycarbonate or fabric roofing account for £600 to £1,050, depending heavily on wood quality (e.g., opting for durable larch) and selected accessories.
- Equipment overhead: The estimated tool hire cost (including a heavy-duty drill, circular saw, angle grinder, and laser level) for a long weekend requires an additional £100 to £170.
- Professional labour: Hiring a specialist team of 2–3 people working 3–5 days incurs an estimated labour cost of £800 to £1,350, varying by region and design complexity.
FAQ: Advanced Hardware & Connectors
Do structural timber brackets always have to be hidden?
No, modern hardware systems are designed to be explicitly visible rather than concealed. According to construction guidelines by Jen Woodhouse, black powder-coated decorative connectors are described as both decorative and structural, completely eliminating the need to rout or hide heavy steel joist hangers inside the timber.
Do heavy structural screws require pre-drilling?
Typically, premium fastening hardware mitigates this time-consuming step. When using these advanced external connector systems on certain softwoods, the accompanying structural screws and hex-head washers may not require pre-drilling to install, relying instead on aggressively integrated cutting threads that pull the hardware tight. However, pre-drilling generally remains recommended for hardwoods and thicker timber sections to prevent the dry wood from splitting.
Conclusion
Looking forward, as extreme heat waves become a more frequent summer reality across Europe, the traditional open-slat timber frame may require functional evolution. On current trends, even basic residential builds could increasingly benefit from integrated bioclimatic upgrades. Incorporating mechanical shading and automated heat venting systems into standard architectural planning has the potential to transform the static wooden pergola from a simple garden aesthetic into a more climate-resilient living space.